iPhone is the most popular phone all over the world. It is totally different from other phones because it runs on IOS. But the main problem of iPhone is its storage because you can’t insert SD card in it. Now, Apple introduces the latest update which can solve the storage problems and clear you same extra space. In this way you can get Extra storage on your iphone.
Apple is using the new way of formatting storage which is useful for iPhone and iPad and this can get you in latest update iOS 10.3. In this update, you can able to clean your iPhone space, so you can get a different amount of free space as compared to other devices.
There are many methods which are used to add extra storage on iPhones.
Method 1:To upgrade its operating system iOS 10.3.
How to Check Your Storage: If you want to know how much extra storage you can get, first you get to check how much space on your iPhone. It includes many steps that are following:
Step 1:- First, go to the setting app.
Step 2:- Go down and press on general.
Step 3:- Scroll down click on storage.
Step 4:- After this, take a screenshot by pressing the power and home button which is useful to compare the storage after the update.
How to Download iOS 10.3
Now, we discuss how to download iOS 10.3 for getting extra space. It is not so hard to update the new version, just follow the steps that are mentioned below:
Step 1:- Go to the Home Screen and then go to the Setting app.
Step 2:- Then show the general page in the Setting app, the software update which is at the top of the page.
Step 3:-If an upgrade is ready just press download and install, it will take some time to download depend on the speed of your internet.
Step 4:- After the completion of downloading, it will restart your iPhone.
Step 5:- After finishing of downloading & installing iOS 10.3, then you can see how much extra space on your iPhone.
Method 2:- By using iCloud usage.
The iCloud service provides added storage for you iPhone in which you can save and access all your important files over the internet. This service uses the storage space of the Apple Servers or Cloud.
Users can create an iCloud account right on your iPhone device for instant access to the service. Creating an iCloud Account on iPhone includes following steps:-
Step 1:- Click on “Settings” tap on the home screen of your iPhone. In this, you can view all the customizable options for your iPhone.

Step 2:- In this, scroll down the settings screen and tap “iCloud” from the list of entries. Then you enter in iPhone’s iCloud service setting where you can customize various options for the service.

Step 3:- if you already have an Apple ID, then you don’t need to create an iCloud account. This service is already to available to you and you have to enable it.
But if you don’t have Apple Id, then find “Get a Free Apple ID” on the lower portion of the iCloud settings screen. This will begin the process of creating an iCloud account and pop-up menu will show where you enter your date of birth.

Step 4:- Use the scroll buttons then you see a pop-up menu to select your birth date and tap the “Next” button on the upper right-hand corner of the menu to continue.

Step 5:- On the next step, you enter your full name. Type in your first time and last name in the text fields provided using on-screen keyboards and press “Next” button for proceeding to the next step.
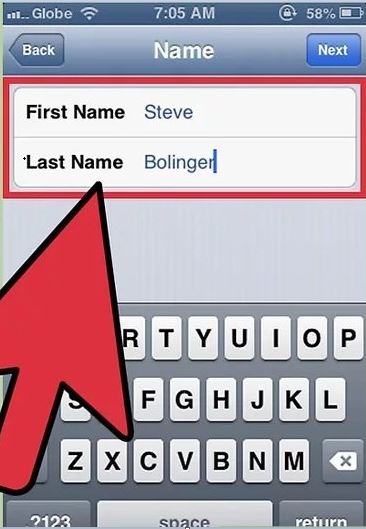
Step 6:- In this step, an email address is needed to sign up for an Apple ID. For this, you can use an existing email or create a new iCloud email address.
If you choose an existing an email address then click on “Use your current email address” and you enter an email address and its password. Then tap “Next” button on the top right-hand corner to proceed to the Security Question.
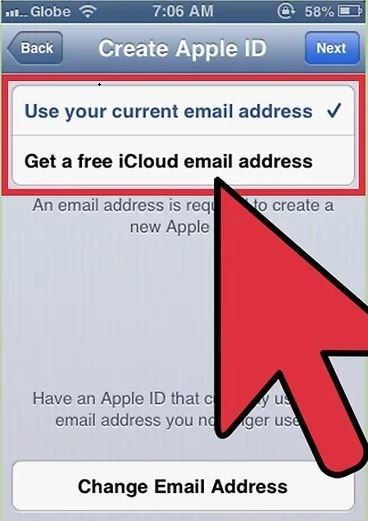
Step 7:- If you prefer to create a new iCloud email address instead of an existing one then tap “Get a free iCloud email address” and enter the email address which is used for the iCloud account. Then click on “Next” button and enter “Password” and re-type and click on “Verify” to confirm. After clicking on “Next” then you will proceed to next step.

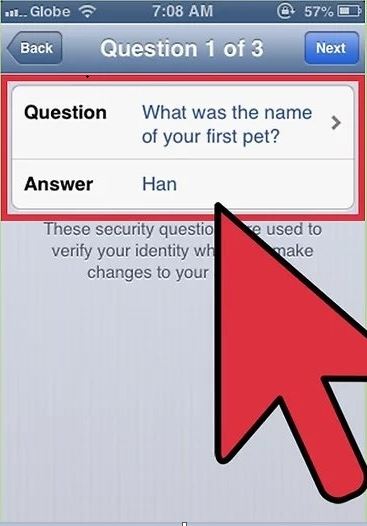
Step 8:- In this step, you choose three security questions which will be asked if you forget your password and try to recover it. Tap “Question” field and select security question and tap “Answer” text field. Enter your answer. Then click “Next”.
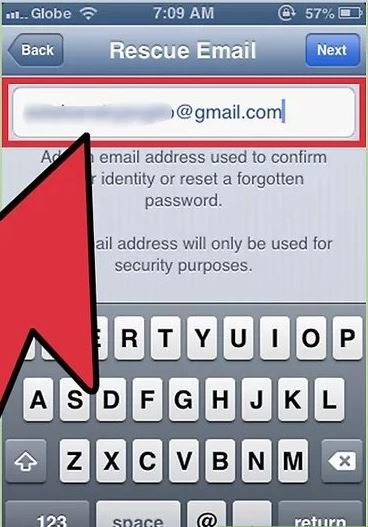
Step 9:- The next step requires entering an alternate email address where your iCloud account password can be sent in the case you forget it. Enter email address and click “Next “ button to continue to next step.
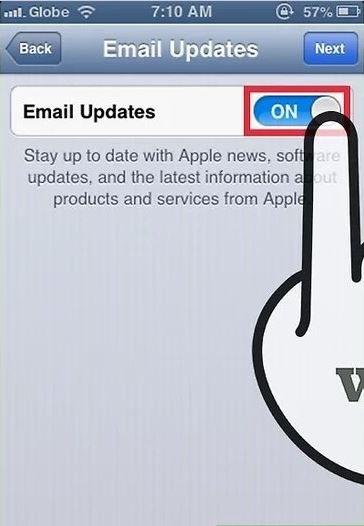
Step 10:- If you want latest email newsletter then tap the toggle switch and set it to green otherwise tap the switch and set it to color grey. This part is optional and once more tap “Next” button.
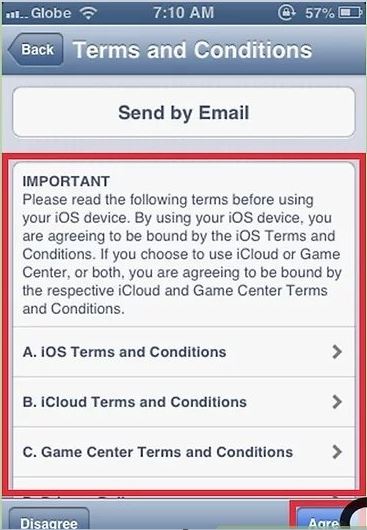
Step 11:- This step shows the terms and agreements related to creating an iCloud account. Read all statements and tap “Agree” button to complete the setup and create your apple ID. If you tap “Disagree” then it discards all the information and back sent to the previous step.
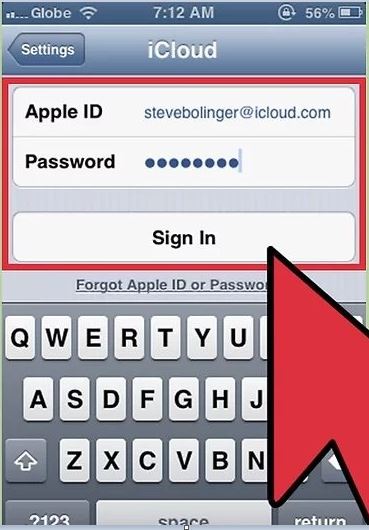
Step 12:- After this, you redirect back to the iCloud settings screen. Then enter your “ID” and “Password” field and tap on “Sign In” button to start using a newly created iCloud account.
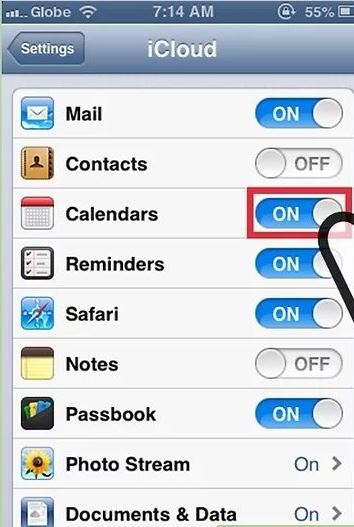
Step 13:- There will be several iCloud services listed, each has a toggle switch. Slide switch to green on the services you want to enable on your device. You can enable the following:
iCloud Drive allows you to save files to iCloud Drive, which you can access with other devices connected to the same iCloud account.
Photos allow you to upload and backup photos to iCloud.
Mail, Contacts, Calender, and Reminders will synchronize information with all these options.
Backup allows you to use iCloud to backup your iPhone.
Apple iCloud offers 5GB of space for free. But you can extend this storage to pay some money per month.
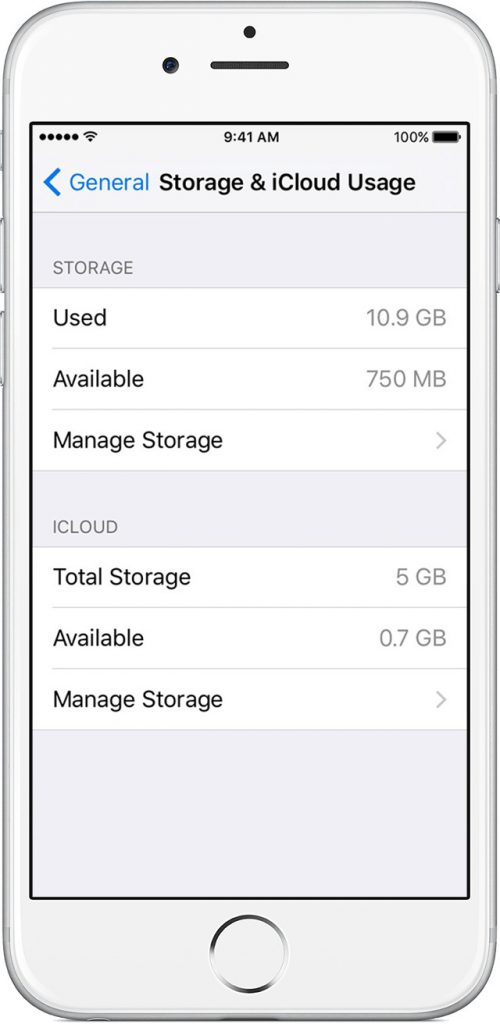 image source : WikiHow
You may also like:
- How to Erase Your iPhone’s Data Before You Sell it
- How to Access iPhone or Any iOS Device in Linux
- 6 Samsung Galaxy S8 Features Missing in Apple iPhone 7 Smartphones
- Apple Just Launched Red iPhone 7 And It Looks Stunning!

No Responses